Delivery Date Document
DingDoong: Delivery and Pickup Setting Guide
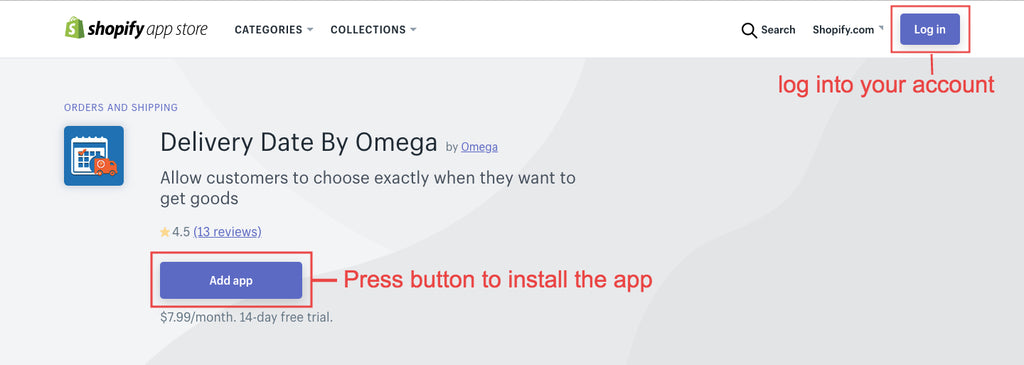
Step 1: Login your Shopify account in the App Store. Click the ADD APP button to install the app for your store.
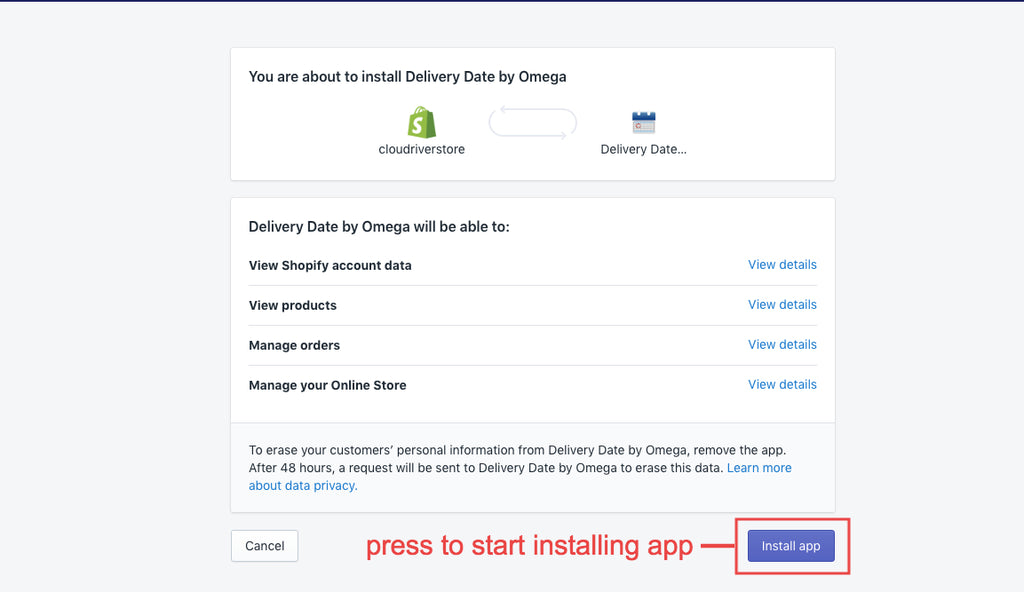
Step 2: You will then be redirected to your admin page to make a payment for the app and start installing.
Step 3: After press Install app, the app will be automatically installed and be ready right away for you to use in the Apps section
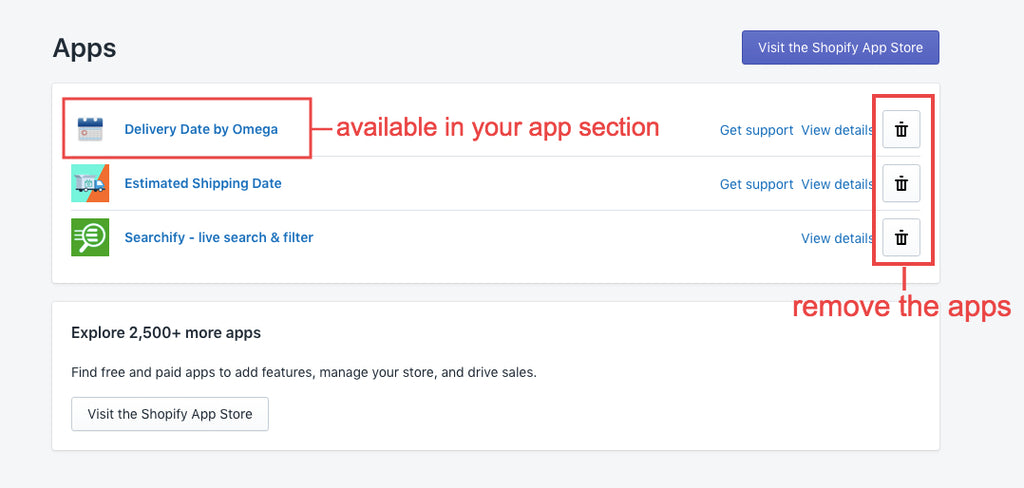
Note: If you have finished installing but either the app does not show up in Apps section or the automatic installation failed, please contact us immediately through
⭐️ How to set up Delivery Date app:
After installing Delivery Date app you will be directed to General Setting tab:
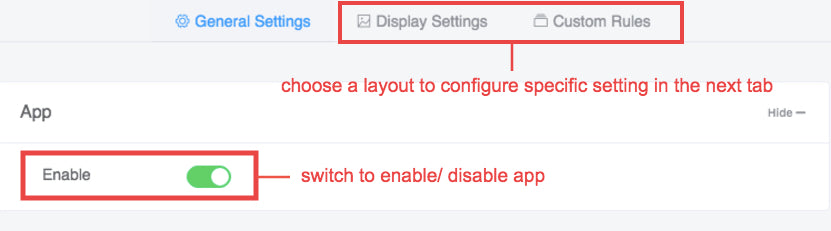
You can enable or disable app by switching the Enable slider in the App section.
Display Settings and Custom Rules are also available for you to display your delivery date information. The chosen panel can be configured in the next tab.
- Display Setting will help you set your date format and display information
- Custom Rules will custom delivery rules for some special products.
1.General setting
Date Setting Section:
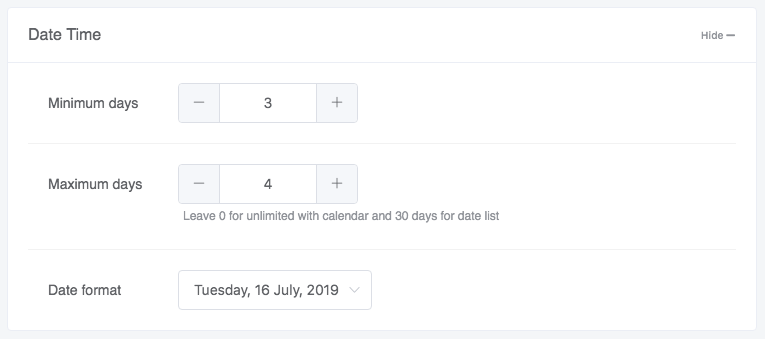
- Minimum days indicates the number of days you need to prepare the goods and ready to ship.
- Estimated days is the number of days it will take to ship the goods from your warehouse to customer.
- You can also choose a Date format that you want to show in the format section.
Time Slot:
There’s a significant change in the usage of the Time Slots section compared to the older version. You can set the delivery date field mandatory in the Time Slots section. You can change the time, add or delete it easily.
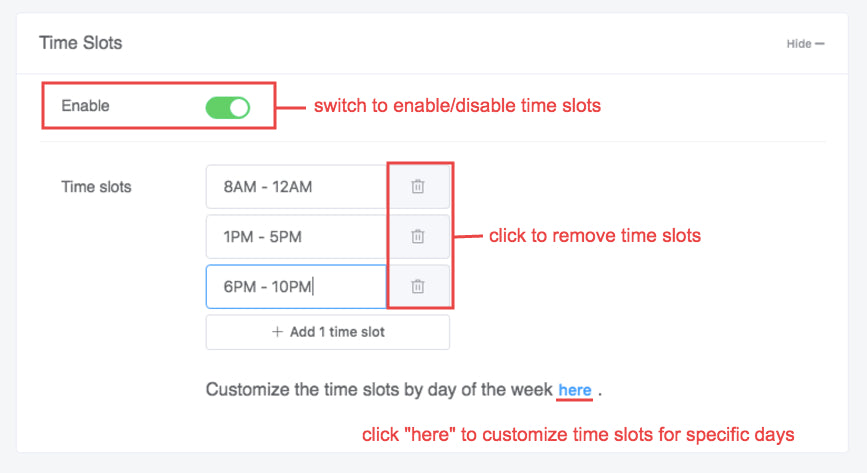
Our update feature provides you with the ability to custom time slots for each day of the week. You can choose whatever day you want to add time slots by enable Override slide.

Week Working Day:
In the Week Working day section, you can configure your general information about the day off, the time at which your store no longer opens for shopping, etc..
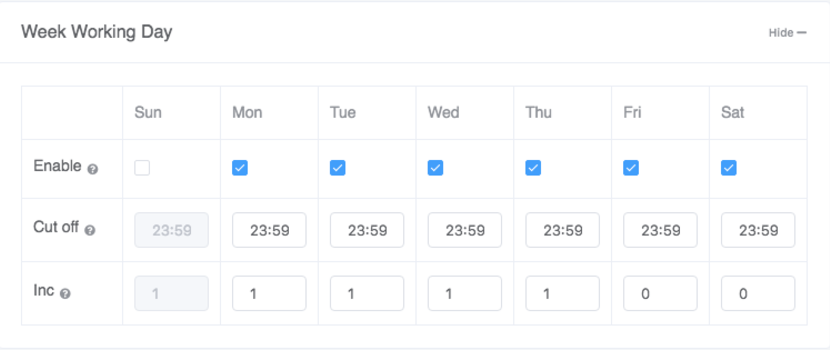
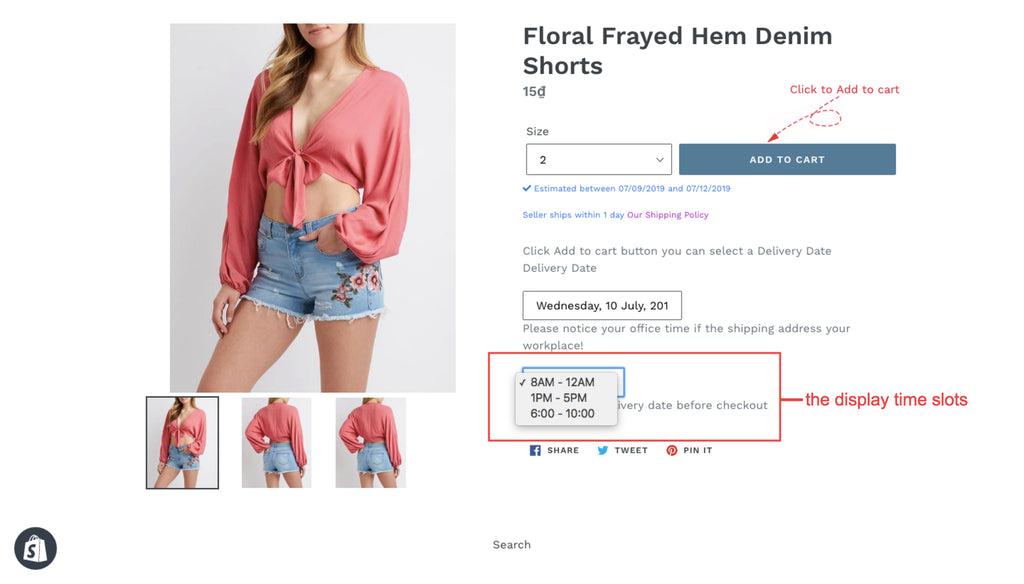
As you enable a working day and fill in a cut-off time, at which your store close for that day. The minimum shipping day also automatically adds 1 more day after cut-off time. This is the examples of how your setting will be displayed on the checkout page:
Limit delivery by orders
You can limit the orders per day by enabling this option.

Same Day Delivery:
You can enable Same Day Delivery if you order before a specific time.
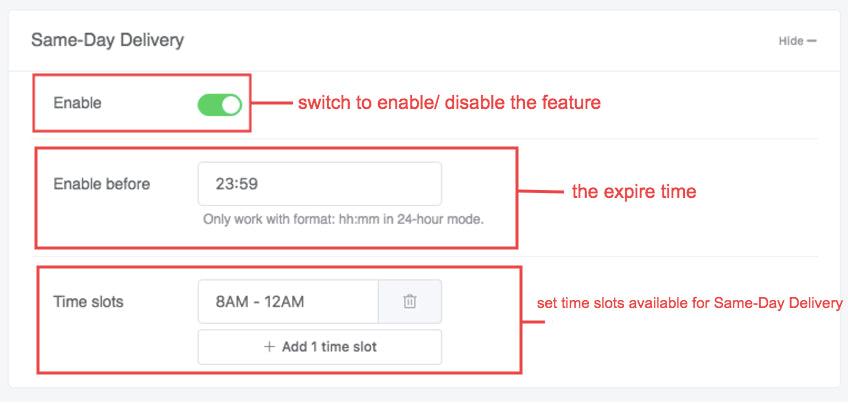
This feature only works during the period of time you choose within a day and expires at the time you set up.
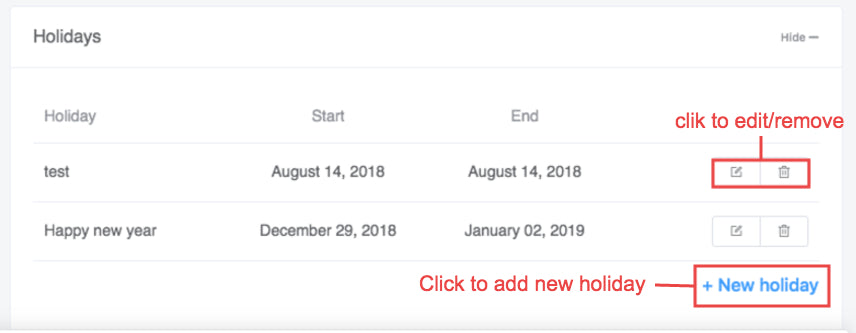
- Click New holiday set holidays on the dates you do not deliver products under Holidays tab. Selected holidays will be disabled for delivery in the delivery calendar on the checkout page. In the picture above we have created 2 examples for you.
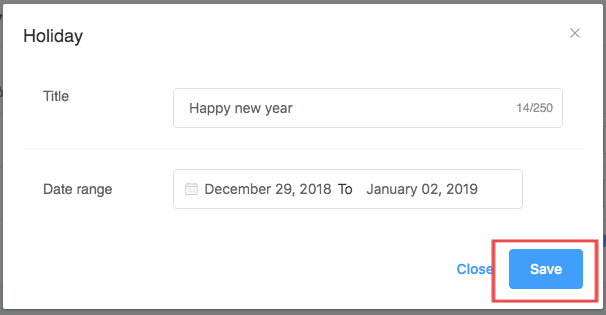
- You can edit a Holiday by clicking icon, in which you can adjust the holiday title and date range, and then click Save to finish:
2. Display Settings
Move on to the next tab, which is labeled Display Settings. In this tab, you’ll be able to set the delivery date field mandatory on the checkout page. Date Input
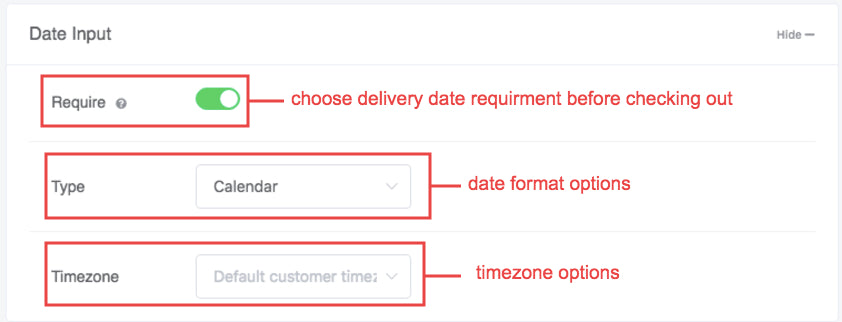
- Particularly in the Date Input section, you can set the requirement delivery date that your customers have to choose before checking out. When disable, this button allows your customer to checkout without choosing a delivery date.
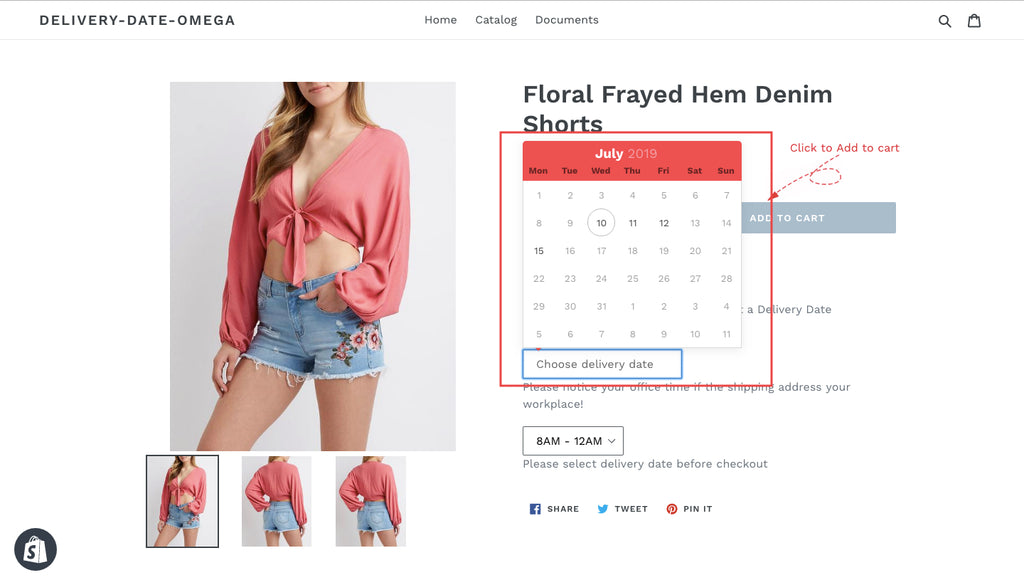
- Choose the format of calendar would be shown on your checkout page, either “Calendar” or “Date list”. For instance, when choose “Calendar” the display date format on the checkout page will look like this:
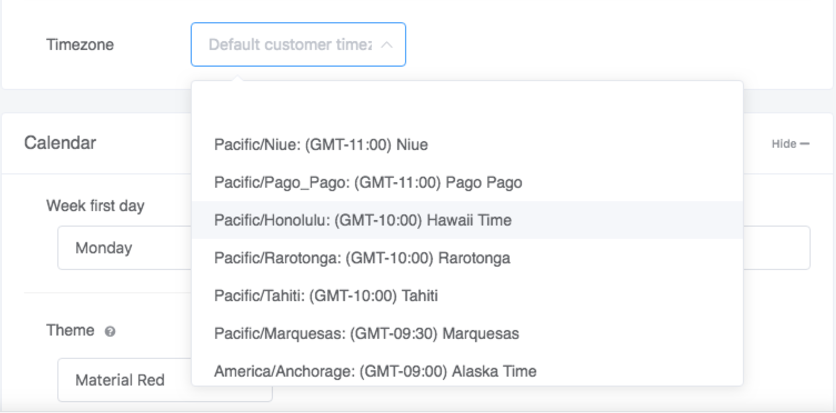
- As for the picture below, we have prepared a wide range of timezone for you to selected from (Pacific, America, Europe, Africa, Atlantic, Asian, etc…)
Calendar:
In the next section, you can adjust your calendar outlook that is suitable for your preference. It's rather simple to customize the calendar theme, languages, color scheme.
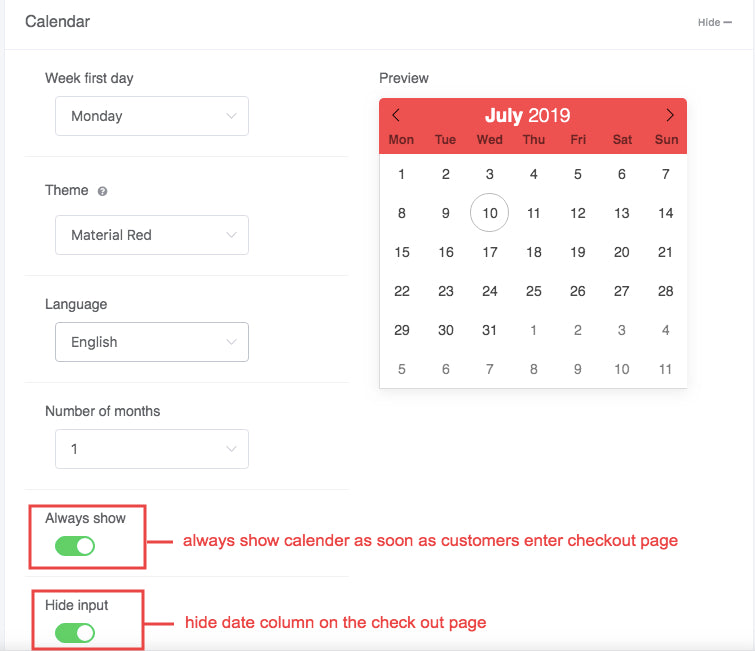
The Always show slider and Hide input will affect the display delivery date on your store. Specifically, when activating Always show, the calendar will display as soon as the customer enter product page. When the Hide input button is switched on, the date column will not be displayed on your store.
Display Position:
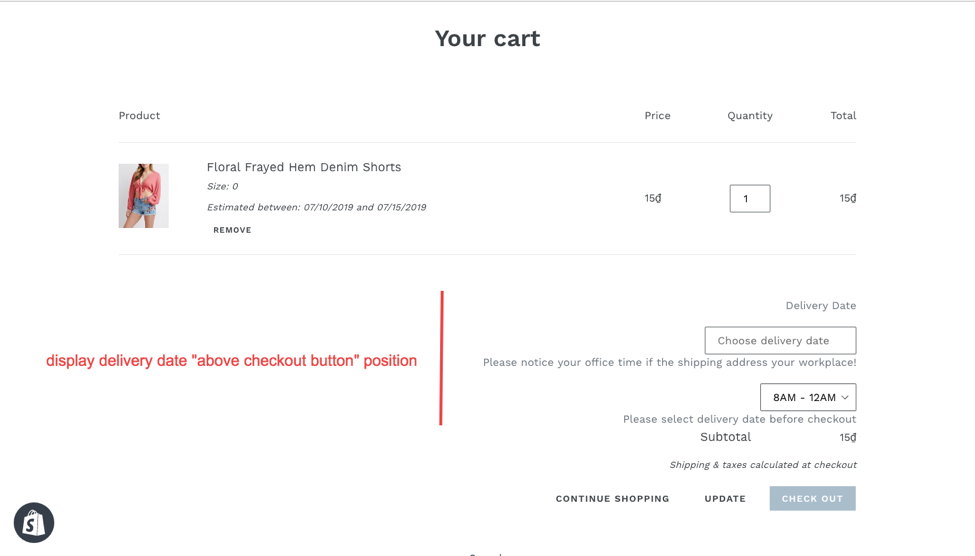
Display Position offer you two options on the cart page which you can choose either above checkout button or below checkout button. As you can see from the example picture above, that is how your cart page will be displayed on your store if you choose “above checkout button”.
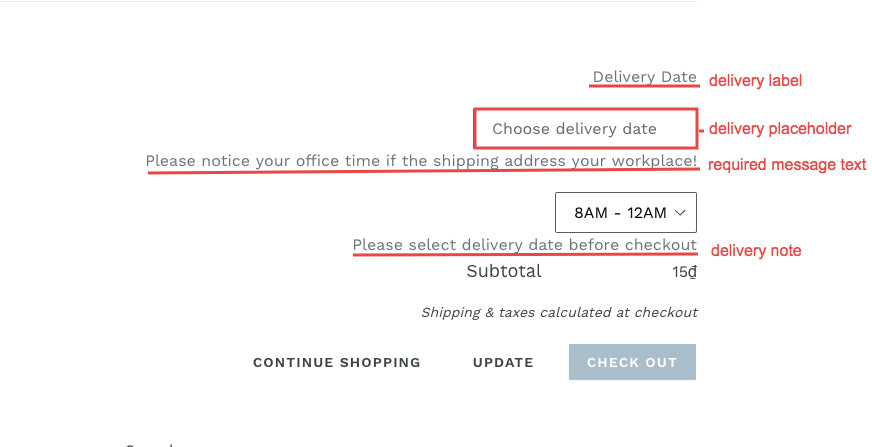
Text:
If you want to customise the message text display associated with each of the fields on your store’s cart page, please edit the information in the Text section:
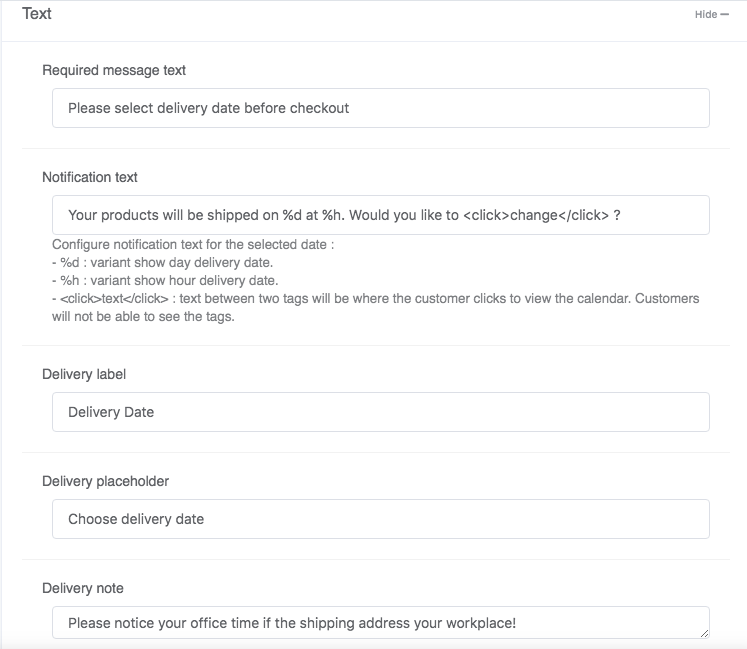
The Notification Text will be shown in the case that your customers have entered the checkout page but then returned to the cart page, at which this text will appear so your customers will be able to change the delivery date if they are uncertain:
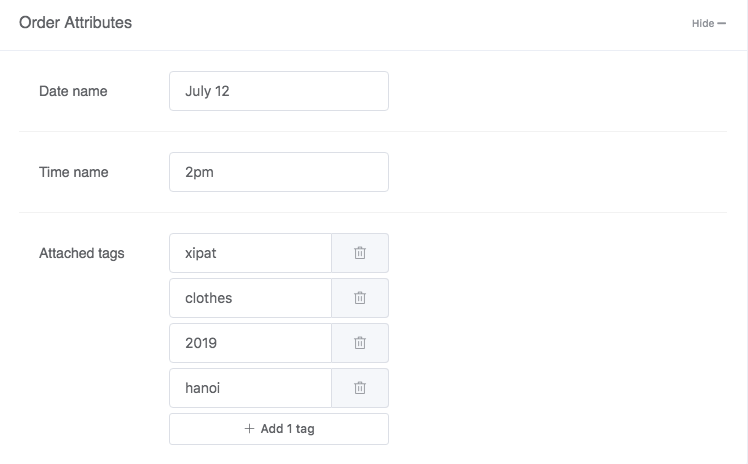
Order attributes:
These features will not visible to your customers, but it will make it easier for you to find your products in the Product or Order section in your Shopify admin page.
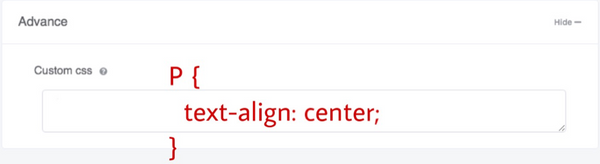
Advance:
You can custom your store by using the Advance section. However, this required knowledge in CSS3.
Applying CSS3 to the interface design helps the website run faster, because there are many layout templates that you can use CSS to design instead of using the background that takes a lot of resources to store and download.
For easier visualization, here's an example of customize your text message by coding for you:
3. Custom Rules
Collections:
In the Collections section, you can apply rules for specific collections:

After clicking New collection, a tab will appear for you to set the rule for selected collection:

Please be noted that you can not add a new collection to set the rule within our app. The list of available collections can be found and edited in your Shopify admin page.
Each collection's rule can be edited or deleted, click Save button to save all the changes you've made.
Disable app collections:
You can disable the display of the app in specific collections, however, please remember that the app in the cart page and product page where contains products in the collections will also not work.

Products:
In the Products section, you can apply rules for specific products:
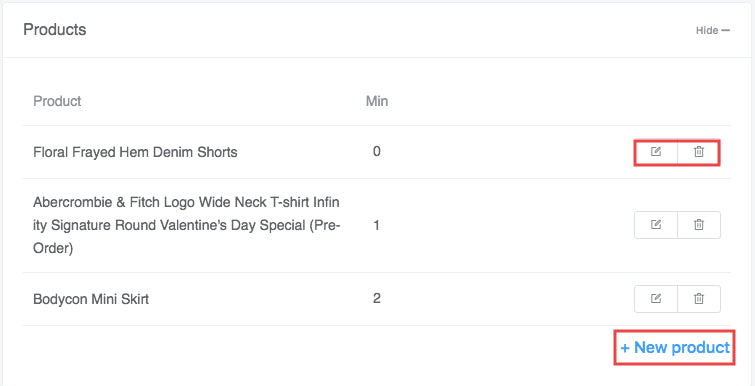
As you click New Product, this tab will show up:
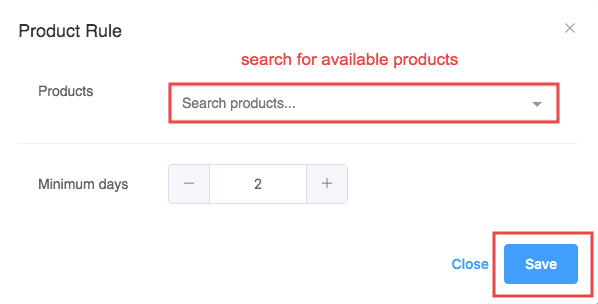
Please be noted that you can not add a new product for your shipment within our app. The list of available products can be found and edited in Products section of your Shopify admin page.
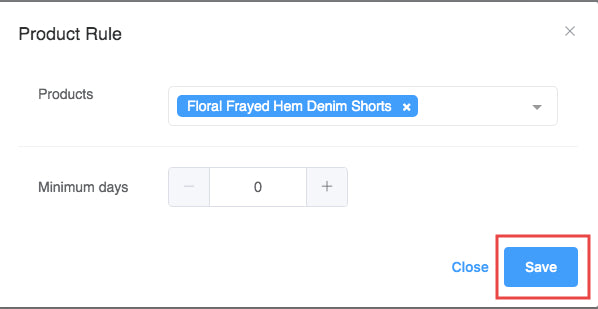
You can edit a rule by clicking icon, in which can change the product and its minimum days. Click Save after you finish your adjustment:
Display settings for custom products:
Display settings for custom products determines what will be displayed for the products you have customized.

- Start Date Priority: You can choose one out of the two default options, which are Longest and Shortest. This means the delivery date depends on the minimum days of the product.
For example, when you select start Date Priority as Longest, the delivery date will depend on the product with the longest minimum days, which is Bodycon Mini Skirt.
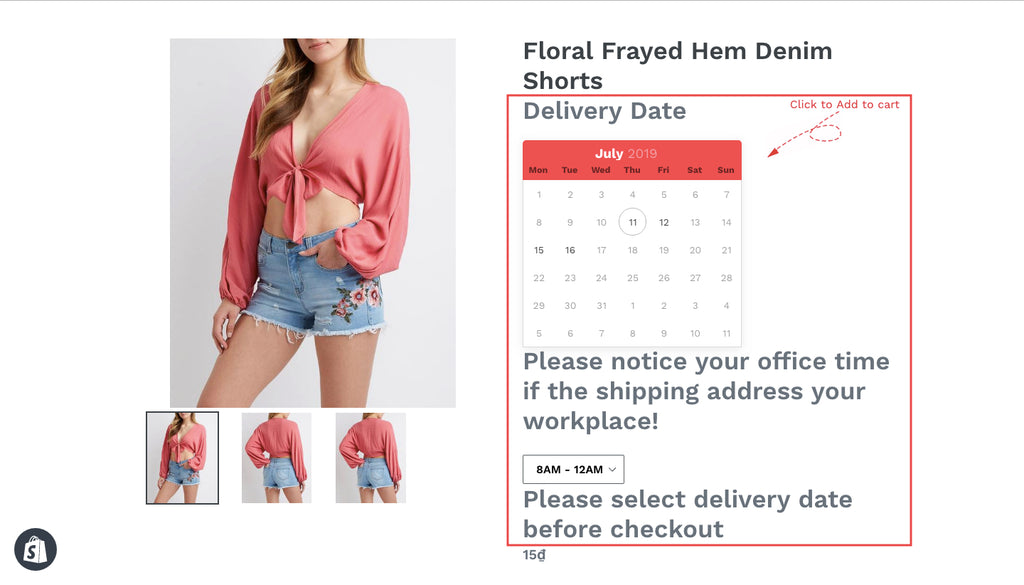
- Show on pages: Delivery Date and Add to cart, can be displayed on the pages you choose Home pages, Products page, Cart page and Collection page.
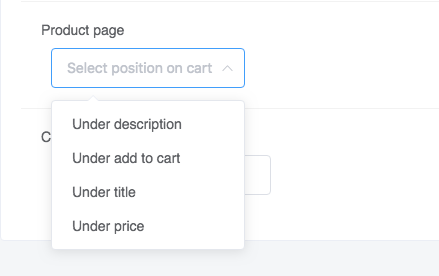
Here is the example of how “under title” option will be shown on the checkout page:
- We already provided you with 4 choices of delivery date positions: Under Add to cart, Under product, Under price, Under title. But if you are not satisfied with the default selections, you can customize it by adding codes to the blank Custom Positions we made solely for this purpose. However, this method requires knowledge about advanced coding, therefore we recommend you contact us for support should you have problems configuring this.
4. Delivery date order
In this tab, you can sort all orders based on order, date of order, customer or fulfillment status for a better management of product and time of delivery.

✏️ Noted:
- Selected delivery date will be displayed on the Additional Details Order page in admin dashboard.
- Free and Fast Support: Our technical support will help you solve any problems within 24 hours (on working days).
No questions yet.