How to connect email account
How to connect an email account
To make the email sending/ receiving function work, you need to configure the email.
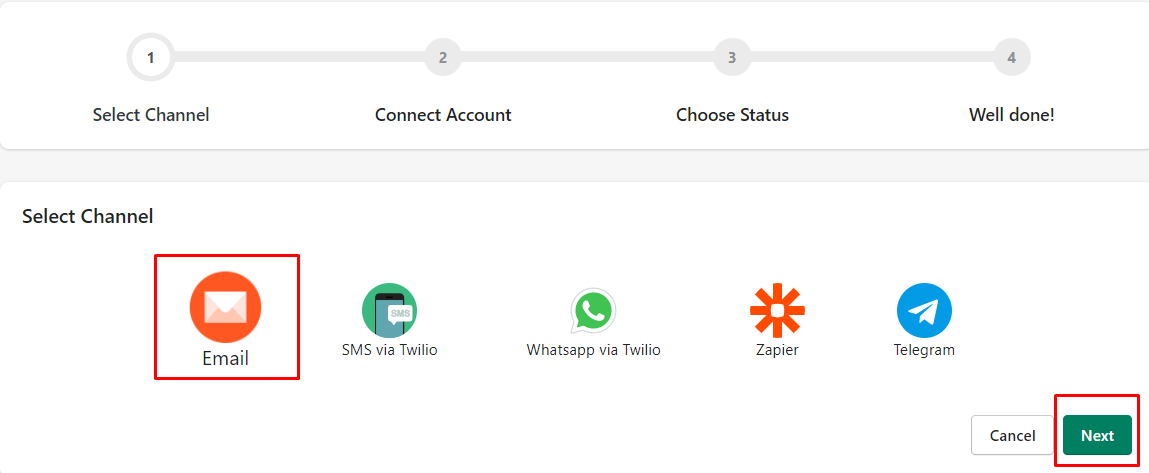
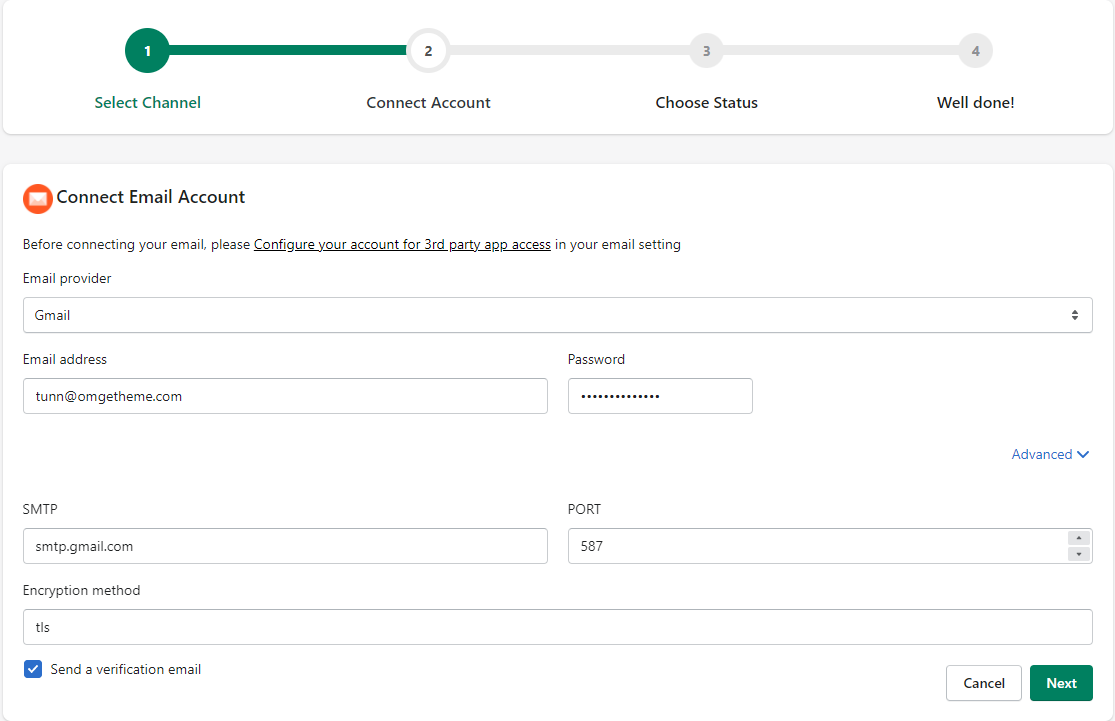
Step 1: Connect Email Account
Fill out your email information such as email address and email password => Click "Next" to connect with the app.

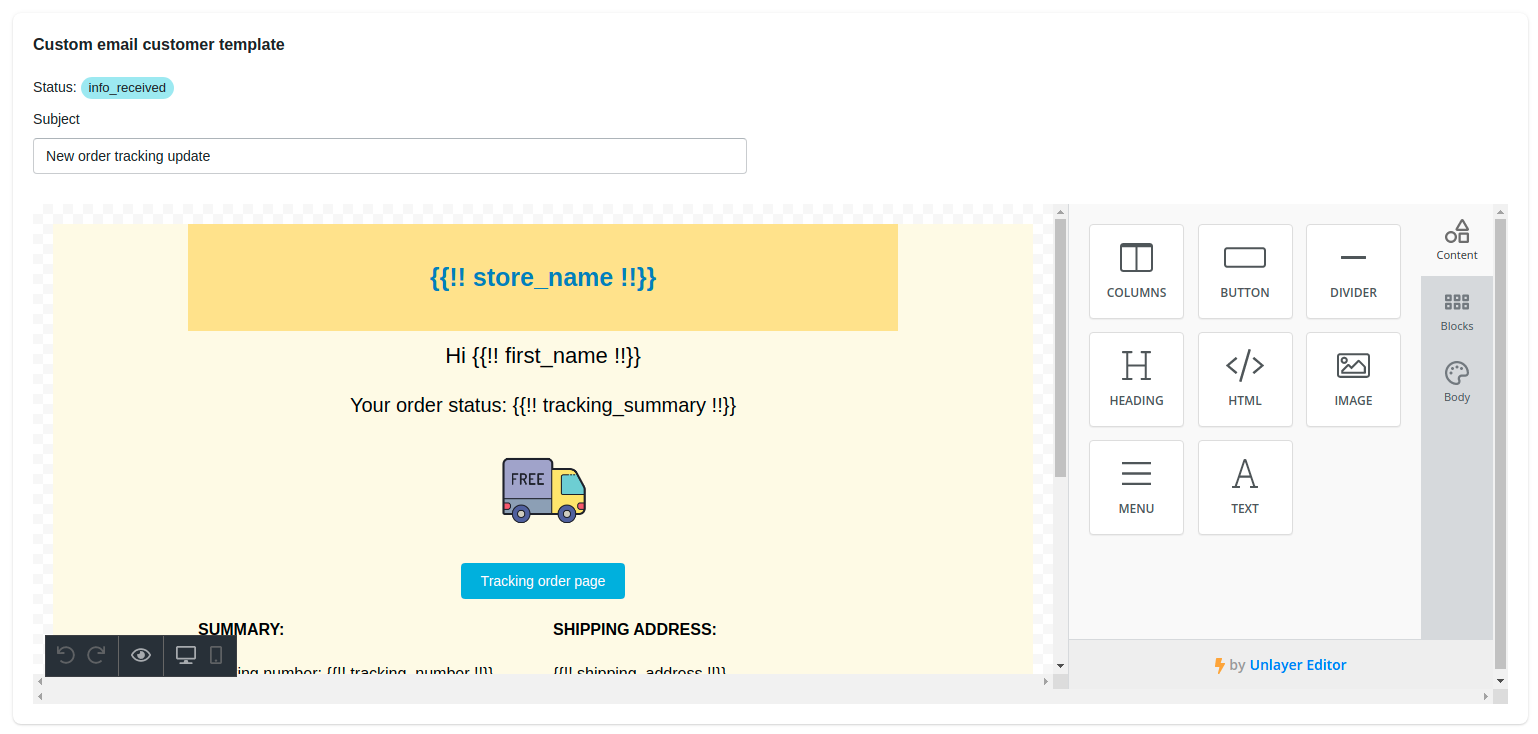
2. Custom email customer template
This is the Email template Settings interface. Set up the email to receive when the order status is changed. These variables { } are replaced with corresponding information from your store. Click the Save button to save the changes that you’ve made.
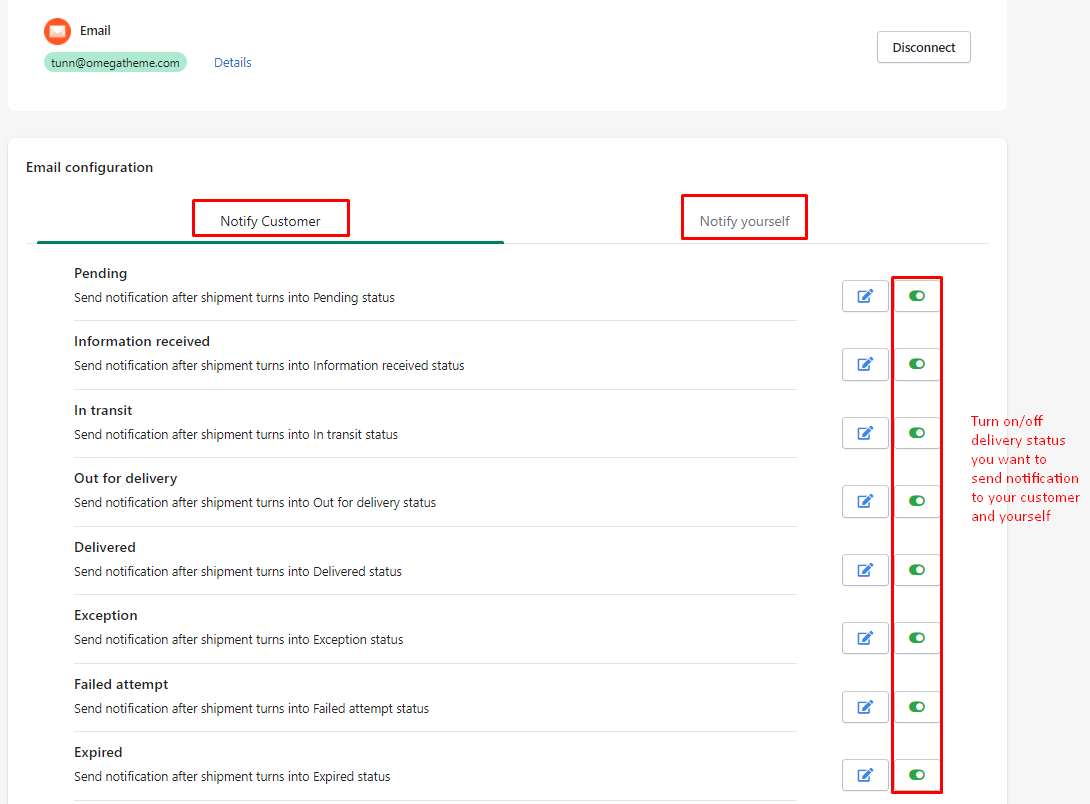
3. Email configuration
While connecting email, if you get this message "Connect channel failed" please turn on "Access to the app is less secure"
⭐️Gmail configuration
1. Go to https://myaccount.google.com/lesssecureapps and sign in with your account.
2. You will see the box like this screenshot, if not go to step 4
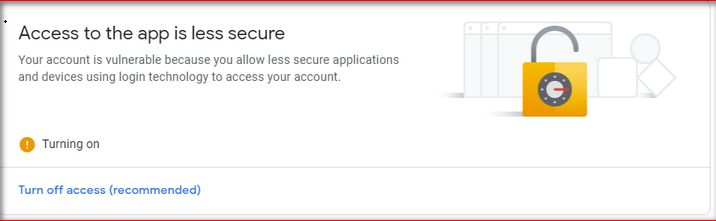
Turn on "Access to the app is less secure"
3. Go to https://myaccount.google.com and sign in with your Gmail account
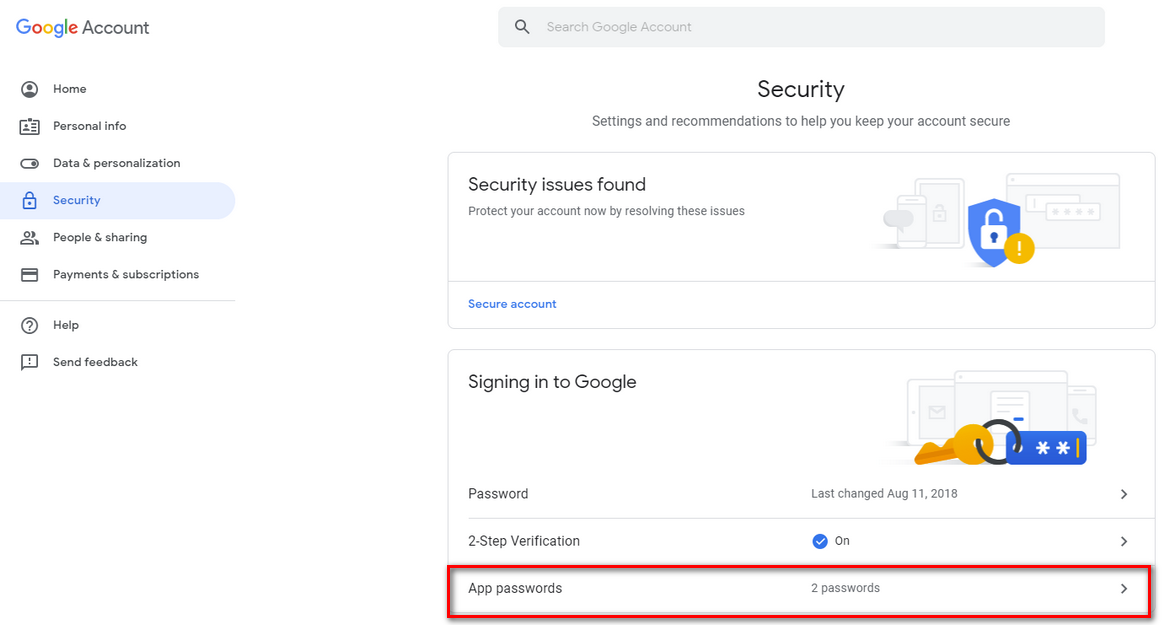
4. Choose Security in the left menu, make sure to turn on 2-step Verification, then choose App passwords
5. In "Select app" choose "Other (custom name)"
6. Input your app's name, then click the "Generate" button
7. Then, a popup with your app's password, copy this password
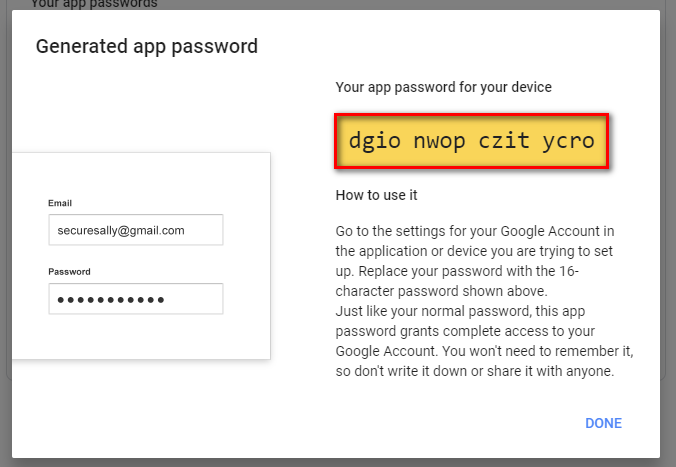
8. Back to our app's admin, go to the "Email Template" tab, paste your app's password to the Password field
*** Important note ***
If you do not see "Turn on "Access to the app is less secure", or it show like below:
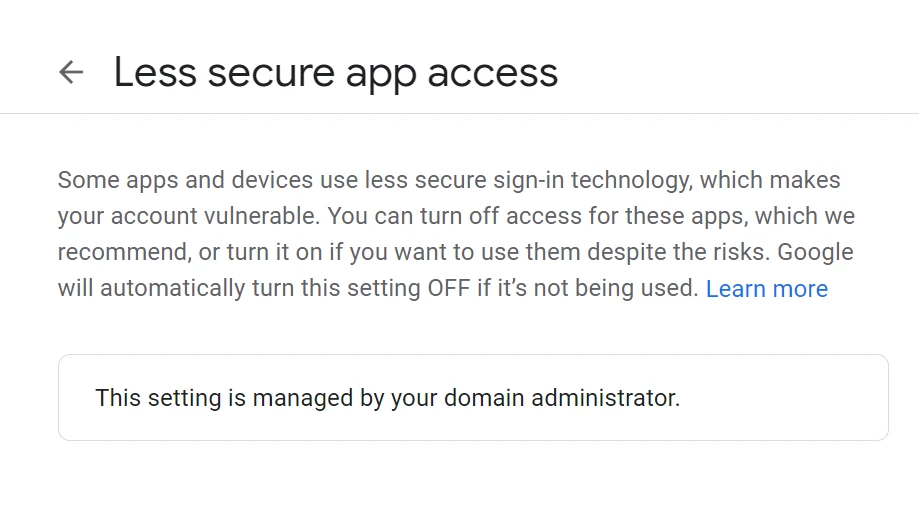
It means the administrator account has disabled this option on your account.
Please follow the following steps to allow this option:
-
Sign in using your Google Admin console.
Sign in using your administrator account (does not end in @gmail.com).
-
From the Admin console Home page, go to Security
Basic settings
- To apply the setting to everyone, leave the top organizational unit selected. Otherwise, select a child organizational unit or a configuration group.
- Select the setting for less secure apps:
- Allow users to manage their access to less secure apps
Users can turn on or turn off access to less secure apps.
- Allow users to manage their access to less secure apps
- Click Save.
Who is your administrator?
Your administrator is someone associated with your mail account, not Google.
Your administrator might be:
- The person who gave you your username
- Someone in your IT department or Help desk (at a company or school)
- The person who manages your email service or website (in a small business or club)
How to Enable 2-step verification for G Suite for work
- Log into your G Suite Admin Console.
- From the dashboard, select Security.
- Next, click on Basic Settings.
- Scroll down to the Two-Step Verification setting and tick the checkbox to Allow users to turn on 2-step verification. This will enable the ability for the account user to utilize two-step authentication if they choose. If you want to make it mandatory for your users to use two-step verification when signing in, please choose Enable enforcement
- Click on the Save changes button that appears.
⭐️Zoho mail configuration
The users need to generate and use an application-specific password when accessing the email account via POP/ IMAP or Active Sync if Two Factor Authentication is enabled for the account.
- Login to http://www.zoho.com/mail as a user
- Click the My Account link at the top to view Zoho Accounts
- From the left menu, select Security >> App passwords.
- Under the Application Specific Passwords, click on Generate New Password.
- Enter the application name associated with this specific password. The app name is just a reference name, for you to verify/ revoke in the future.
- Select Generate to view the application-specific password.
- The device-specific password will be displayed only once and will not be displayed again.
- Back to our app's admin, go to the "Email Template" tab, paste your app's password to the Password field.
⭐️Yahoo mail configuration
You'll need to generate and use an app password. An app password is a long, randomly generated code that gives a non-Yahoo app permission to access your Yahoo account. You’ll only need to provide this code once to sign in to your third-party email app.
- Sign in and go to your Account security page
- Click Generate app password or Manage app passwords.
- Select your app from the drop-down menu and click Generate.
- Follow the instructions below the password.
- Click Done.
- Go to the "Email Template" tab, paste your app's password to the Password field
⭐️Amazon SES mail configuration
Step 1: Create SMTP Credentials
To send emails through the Amazon SES SMTP interface, begin by creating SMTP credentials - a user name and a password - as shown below:
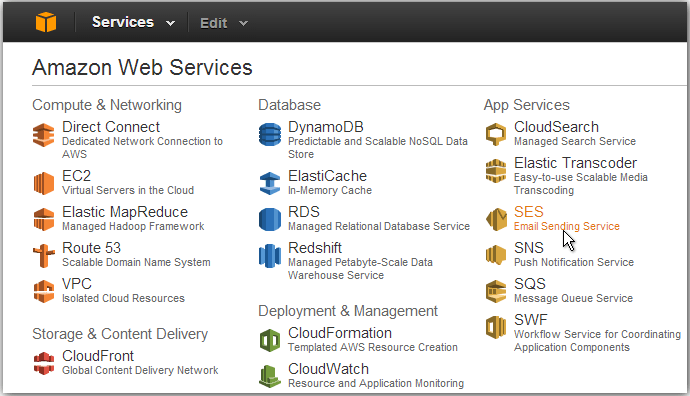
- Log in to the AWS Management Console.
- Click the “SES Email Sending Service” option.
- In the left navigation bar, click the “SMTP Settings” option.
- Click the “Create My SMTP Credentials” button.
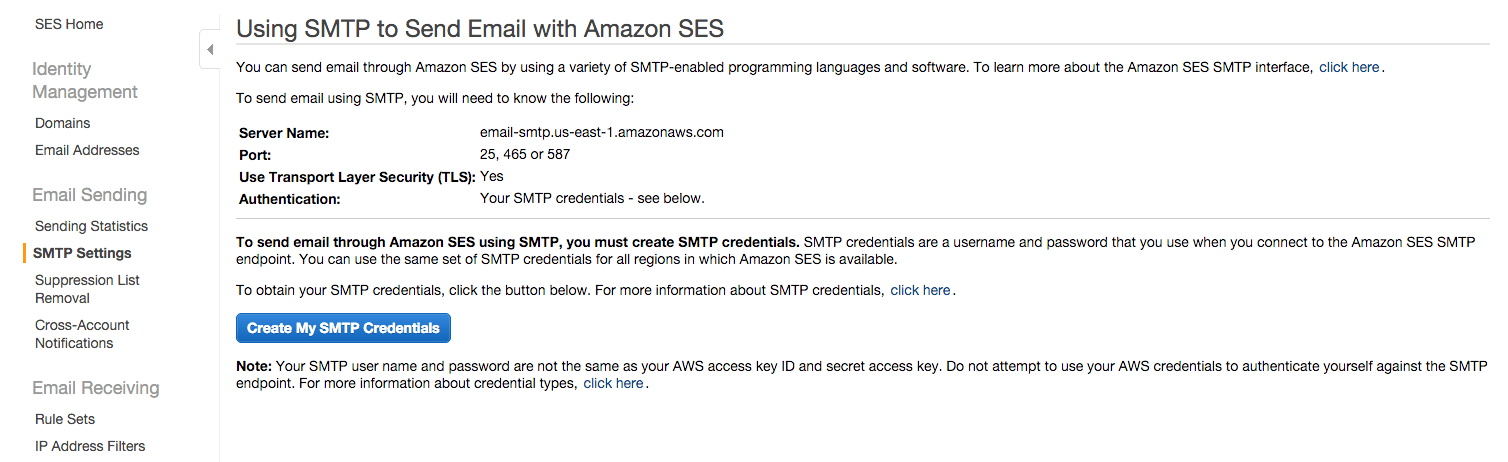
- Copy your credentials or click the “Download Credentials” button as the password will not be shown again.
Step 2: Request Removal Of Amazon SES Restrictions
- Log into the Amazon SES Console
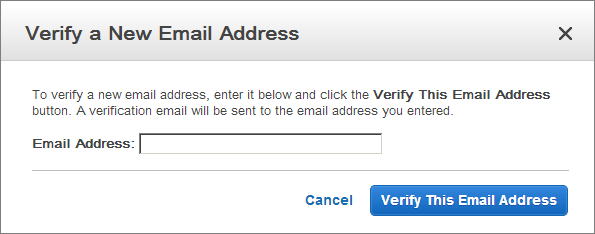
- Click the “Verify a New Email Address” link.
- In the “Verify a New Email Address” dialog, enter the email address you wish to send messages from and click the “Verify This Email Address” button.
- You should now receive a verification message from Amazon SES asking you to confirm that you are the owner of the email address. Click the verification link in the message.
- Check the status of the email address in the Amazon SES Console. The status of the email address should change from “pending verification” to “verified”.
Input Username and password which the correct values from the credentials created in Step 1, while the EMAIL_ADDRESS placeholder should be replaced with any SES-verified email address to the Email template tab.
⭐️Office365 mail configuration
To create a new app password for an app or device, take the following steps. You can repeat these steps to create an app password for as many apps or devices as you need.
-
Go to the Security basics page and sign in to your Microsoft account.
-
Select More security options.
-
Under App passwords, select Create a new app password. A new app password is generated and appears on your screen.
-
Enter this app password in the password bar inside the app settings.
No questions yet.