Create a tracking event for TikTok Pixel
To create an event, you need to create a TikTok Pixel first.
Check out How to set up TikTok Pixel in Shopify if you haven’t installed pixel on your store yet.
Or install the app TikTok Multi Pixels to add TikTok pixel to your store in just one click.
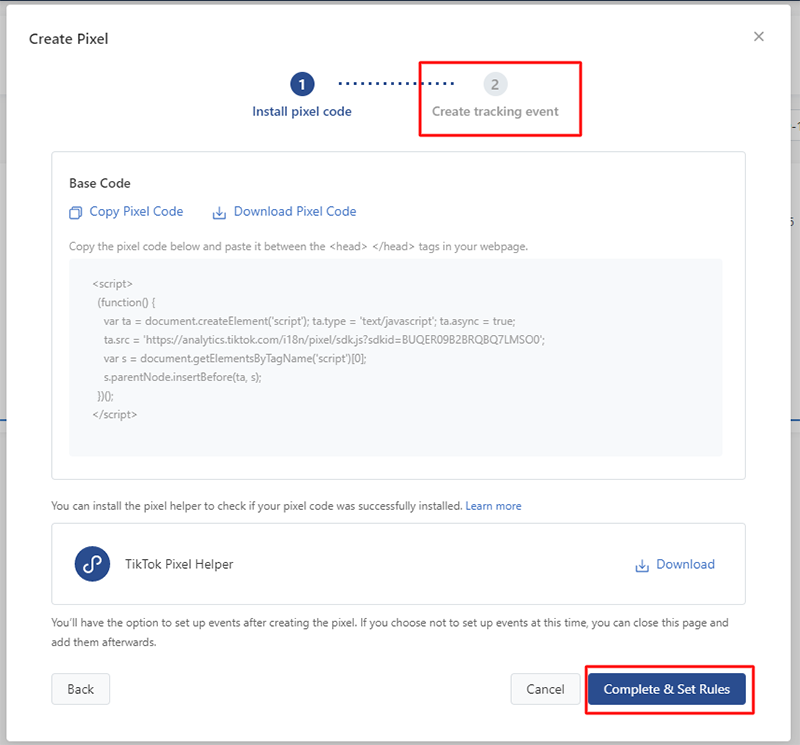
Once you installed your pixel, click Complete & Set Rules to create a tracking event.
TikTok Pixxel 2.0 version has been updated with a total of 17 common events which are divided into 5 groups for the sellers to choose based on different purposes:
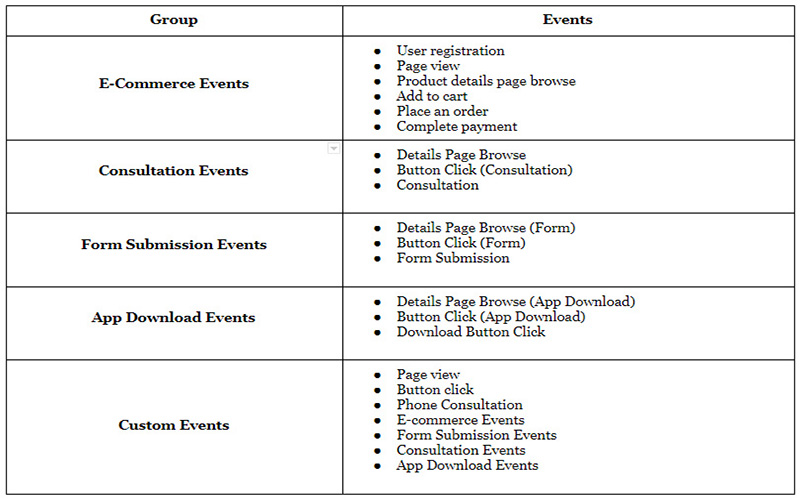
For Shopify users, you will use E-Commerce Events to track the customer’s behavior on your site. A TikTok pixel supports to track a maximum of 5 events if you tend to use the custom events to create a custom audience for retargeting and to define conversions, please notice.
After selecting a group of events, you will choose a specific event that you would like your pixel to track.
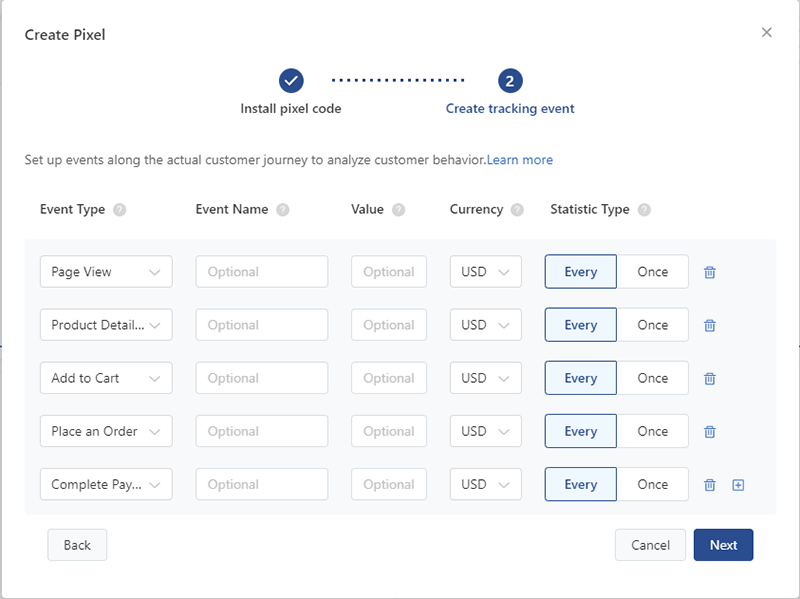
Depending on your purpose, you might not need to use all of the events. You can name and add value for each event, or leave them blank.
Between Every or Once for statistic type, your goal will help you to define whether to use Every or Once tracking per user. For example, if someone clicks on your ad and then makes 3 purchases, pixel will count as 3 conversions if you choose Every for Complete Payment event. If your goal is to track potential customers checking a product after clicking your ads, you can use Once for Product details page browse event.
Let pixel learn the right action
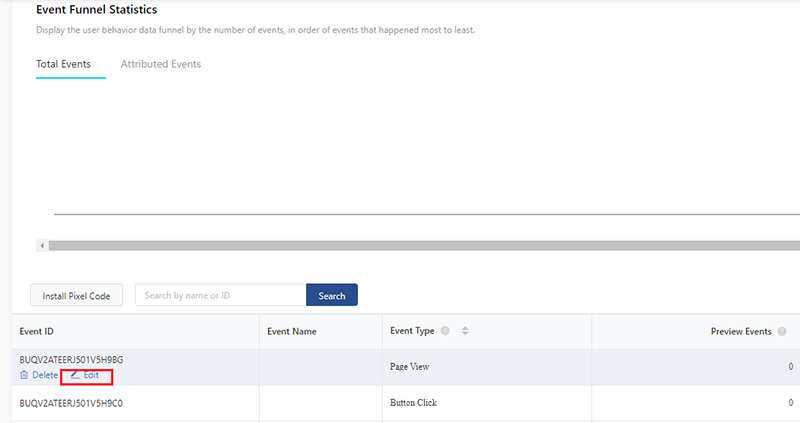
After choosing your event, click Next to set up the conversion for each event. Or if you have saved your events without creating a rule, click again your pixel and edit event
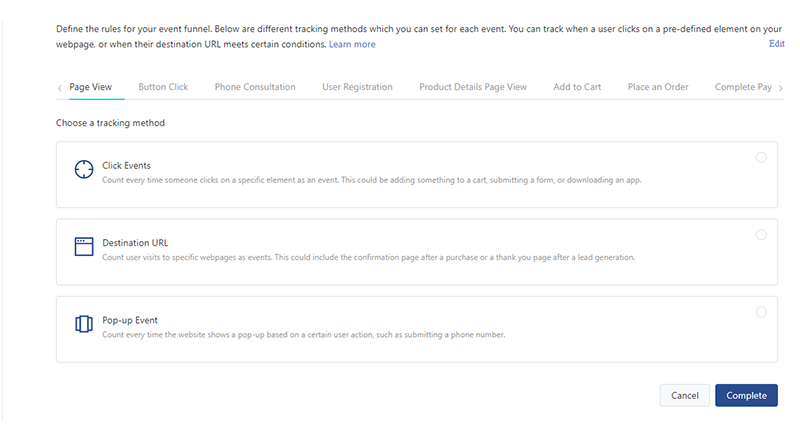
There are three types of tracking method you can see from TikTok Ads Manager including Click Events, Destination URL and Pop-up Event, underneath is the use of each method that you will depend on your event to choose.
Set up triggering rules for Click Events
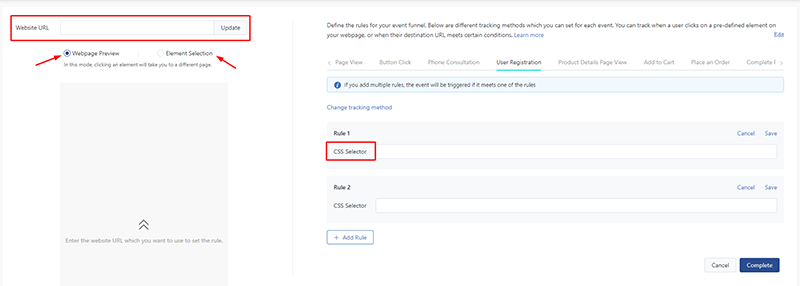
You will use this function if you want to count every time a user clicks on an event, such as the click to add to cart button. You can either enter your website URL and select a button on your website to automatically add the rule to or you can enter your CSS code, make sure you added the right code otherwise the system will show an error. Then click Complete.

Each event you can choose only one element, if you want to add multiple elements, you can choose Add rule. The system will trigger if one of the rules is satisfied, not both.
Set up triggering rules for Destination URL
You also have two options by entering the page URL or set conditions for page browsing (which are contains, does not contain or equals).
Take an example of your Shopify store, on each of your E-commerce events, you can choose “contains” condition and type “product” for Product details page browse, “cart” for Add to cart, “checkout” for Place an order and “thank_you” for Complete payment event. Then click Complete.
You can add multiple rules for page browsing by click on Add page browsing rule. The system will trigger if one of the rules is satisfied.
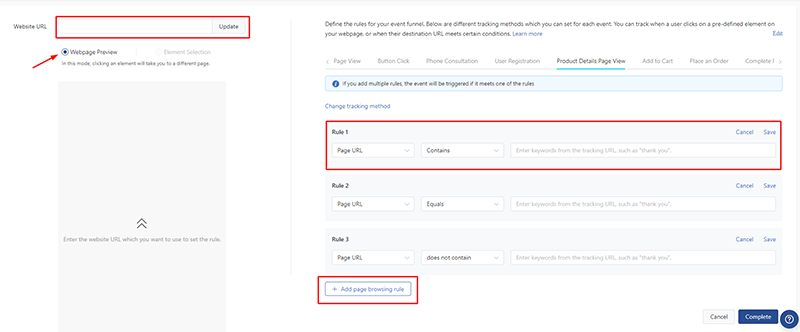
This part only allows you to choose the webpage element.
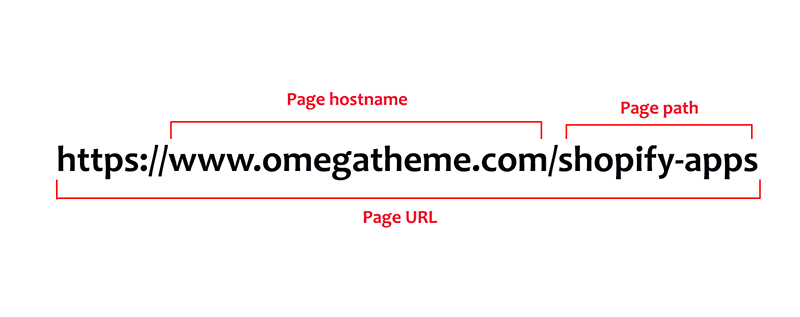
Please make sure that you know the difference between page hostname, page path and page URL to set the right condition:
Set up triggering rules for Pop-up Event
You can use this method when your customers have a certain action on your web like submit a registration or submit a phone number. Same as Click events, Pop-up event also gives you two options to enter your website URL or add CSS code.
Setting precisely from the start will help TikTok Pixel learn faster & more efficiently. It might take a lot of time for your pixels to collect the right data, but you can get a lot of benefits: your ads campaign can reach the right audience, create a better user experience and start getting revenue.
